
Old photo restoration
Restore Old Photos with AI — Sharpness for Worn Prints
Family prints survive as small, soft scans. AI reconstruction brings back faces, texture and resolution — and this page is honest about the two things it cannot do: damage and faded color.
Drop your old photo here
or click to choose a file
JPG · PNG · WEBP · up to 10 MB — only upload images you own or have the right to use.
Sign in to process your image
2 free credits on sign-up · no credit card required
You are out of credits
Choose a plan or a credit pack to keep processing. Failed jobs do not use credits.
What it fixes
What restoration fixes here
Small, soft scans
Most old photos survive as small scans — a 300 dpi flatbed pass, or a phone photo of a print. The structure is all there; the resolution isn't. That gap is exactly what reconstruction fills.
Grain and generation loss
Film grain smeared by re-saving, prints photographed and re-photographed, copies of copies. The model estimates the clean edges and texture underneath the haze.
Faces and fine texture
Faces are what old photos are for. HD reconstruction carries the strongest detail recovery — eyes, hair, fabric weave — and the optional face polish refines further.
The common thread is softness: detail that time and low resolution blurred, but did not destroy. What the tool does not fix is damage that sits on the print — that is the next section, and it matters with one-of-a-kind originals.
Example
Real restorations from this tool
Both pairs are the production pipeline’s HD output for those exact inputs — not the untouched originals. Faces, clothing and foliage sharpen up; the palette stays as scanned.
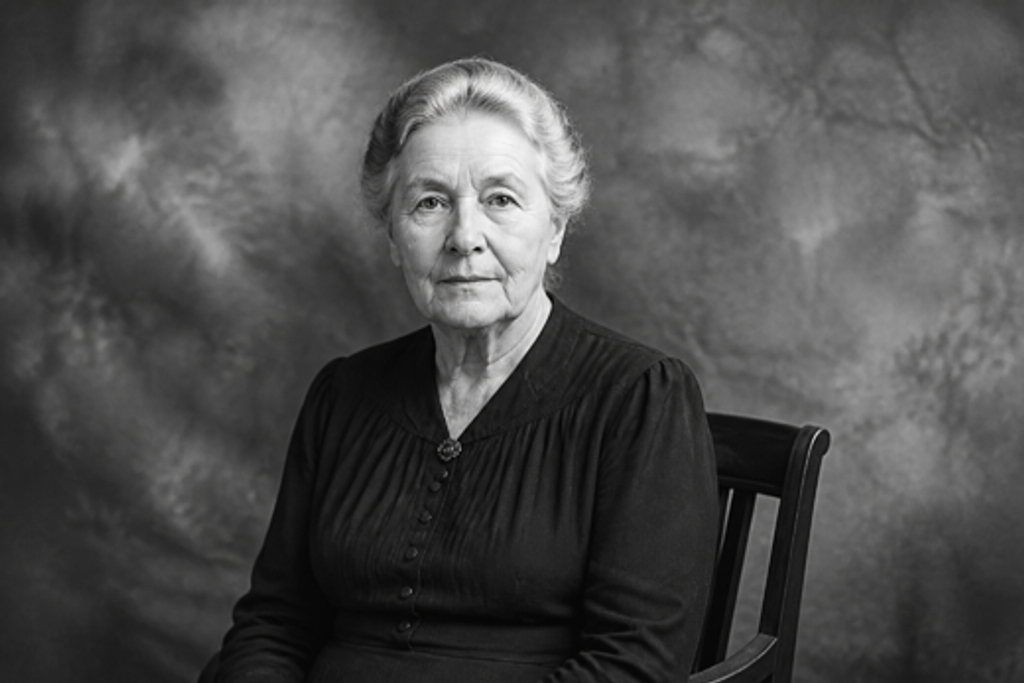 Before
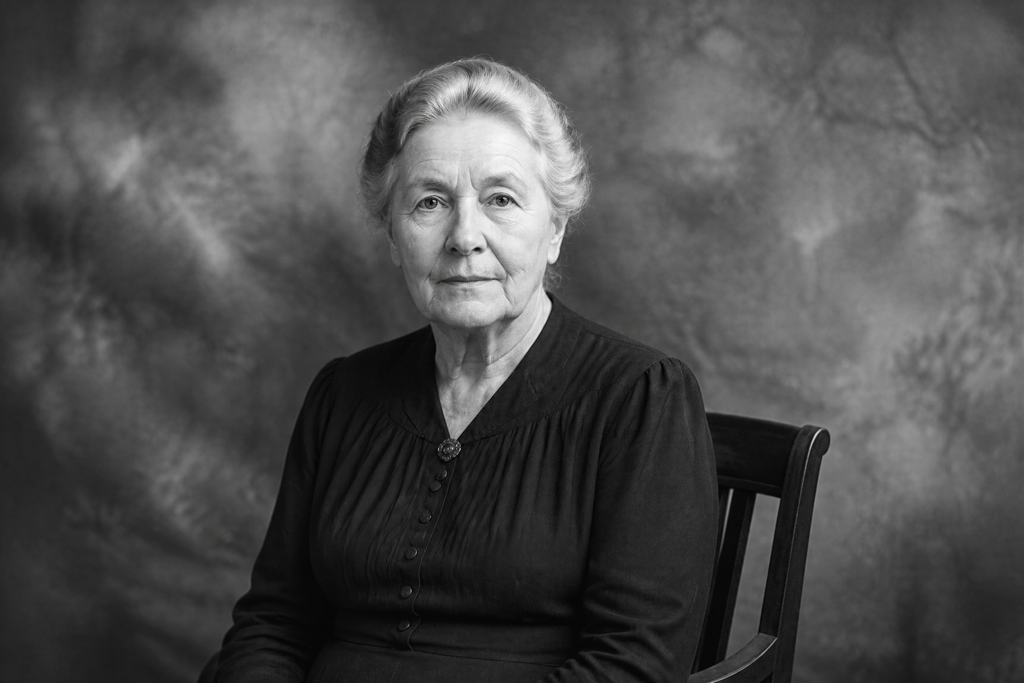 After
After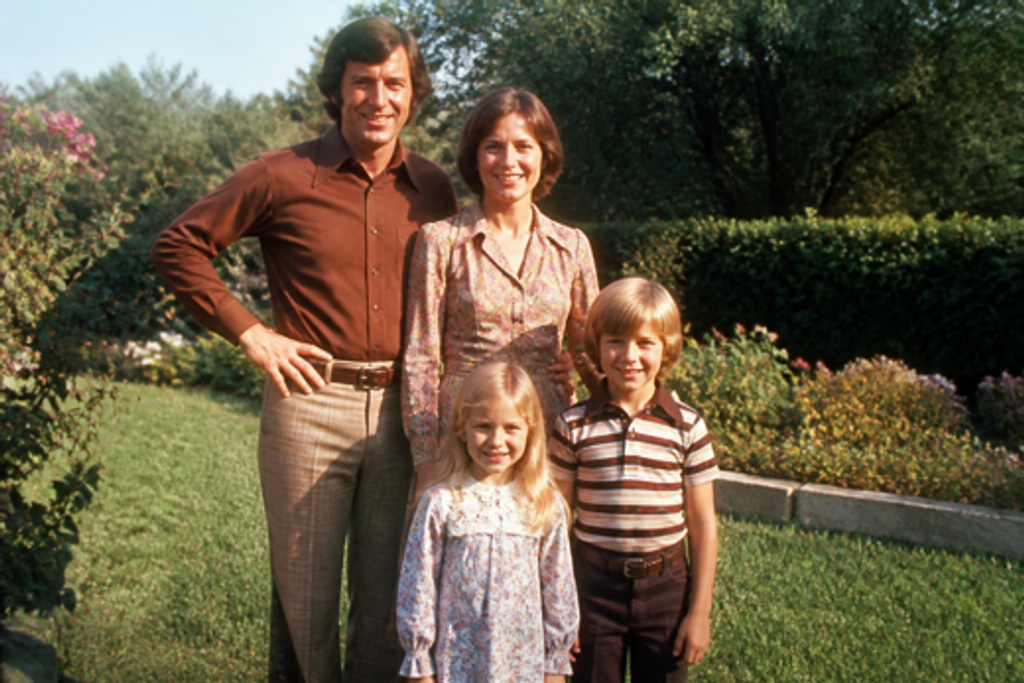 Before
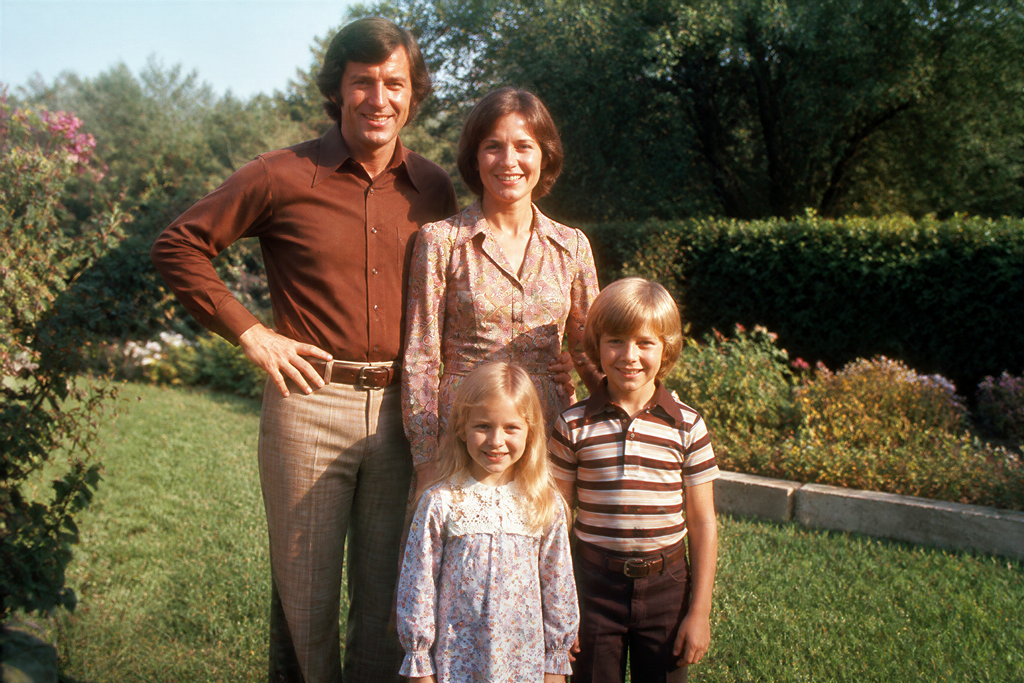 After
AfterUse cases
The prints people bring here
Family portraits and group shots
The one photo of a grandparent's whole generation. Reconstruction sharpens every face in the frame — the estimate keeps each person looking like themselves.
Weddings, babies and milestones
Moments that can never be re-shot. A soft print comes back at frame-and-print resolution, ready to be given to the people in it.
Photos of photos
A phone snap of a framed print — glare and all the more reason to rescan it properly. The scanning tips below take two minutes and change the result more than any tool.
Start with the scan
Scan it right first
Reconstruction can only estimate from the structure it is given, so the scan quality bounds the result. Five habits that make a real difference:
- Scan at 600 dpi, print flat on the glass, glass cleaned first.
- No scanner? Indirect daylight, no flash, phone parallel to the print.
- Don't pre-edit — sharpening or filters before upload only destroys structure the model would have used.
- Save as PNG or a high-quality JPG; heavy JPEG settings add artifacts on top of softness.
- A small file is still fine — reconstruction upscales, so a 400px-wide scan is worth uploading.
On a phone only? Fixing a blurry picture on iPhone covers the capture settings that keep detail in the first place.
Which mode
Standard or HD for old photos?
Standard (2 credits, up to 2MP) is the honest first look — it shows what reconstruction will do for a given scan. HD (8 credits, up to 8MP) is where one-of-a-kind prints belong: the strongest detail recovery on faces and fabric, at a size that survives framing and re-printing.
A workflow that works: Standard first to see the estimate; if the scan has the structure, run HD for the keeper. Failed jobs are refunded automatically either way.
What to expect
What comes back — and what stays
Works well
Small soft scans, grainy re-copies, low-resolution haze — anywhere the structure survives but the sharpness does not. Faces come back recognizable, black-and-white stays black-and-white, and output arrives at the mode’s size (Standard 2MP, HD 8MP).
Out of reach
Scratches, stains, tears and creases pass through unchanged — the model reconstructs degraded detail, it does not inpaint regions. Faded or yellowed color stays faded too. For those, a photo editor’s heal tools (the trade-offs are in our Photoshop comparison) or a manual color-restoration service is the right instrument.
Every result carries the same disclaimer: output is a plausible estimate, not a factual restore of the original. For the background in depth, read how to unpixelate an image; if the old photo’s problem is blur rather than size, unblur image is the focused page.
FAQ
Old photo restoration — frequently asked questions
Can AI remove scratches from an old photo?
This tool cannot, and we would rather say so: the model reconstructs degraded detail, it does not inpaint regions, so scratches, stains, tears and creases pass through unchanged. A photo editor's heal tool handles small marks; deep damage is work for a manual restoration artist. What this tool does is make the surviving detail sharp — which pairs well with either.
Can it fix faded or yellowed color?
No. Restoration here is reconstruction, not color correction — a faded orange cast comes back as a sharp orange cast. Editors and dedicated color-restoration services recolor; this tool makes what is in the frame readable again.
Does it work on black-and-white photos?
Yes — and the photo stays black-and-white. The model reconstructs detail within the original palette; it does not colorize, so a monochrome print keeps its monochrome character.
Will it change the faces?
The output is an estimate of the same person, not a re-imagining: identity and expression are preserved, and HD carries the strongest fine-detail recovery. Like every estimate it should be checked against the original print — for a one-of-a-kind portrait, keep the scan.
What is the best way to digitize an old print?
A flatbed scanner at 600 dpi with clean glass, the print flat, and no pre-editing is the gold standard. A phone photograph works too: indirect daylight, no flash, phone parallel to the print. Save as PNG or high-quality JPG — every generation of saving costs detail.
Is it free?
Sign-up includes 2 free credits — enough for one Standard run — and no credit card is required. After that, Standard output costs 2 credits per image and HD 8; failed jobs are refunded automatically.
What resolution do I get back?
Standard delivers up to 2MP — plenty for sharing and small prints. HD delivers up to 8MP, which is where faces and fabric start to hold up at frame size. A one-of-a-kind print is the case for trying Standard first, then HD.
How does this compare to a manual restoration service?
They do different jobs. A restoration artist inpaints damage and recolors by hand — hours per photo, at a matching price. This tool reconstructs sharpness and resolution in about thirty seconds. Practically: repair damage in an editor first if the print has it, then run the result here for detail — and for the app-store alternative, see our Remini comparison.
More questions? See the frequently asked questions page.
More pixel tools
Related jobs, one toolbox
Unpixelate image (AI)
The main tool: full photos, faces, textures and scenery, reconstructed in the browser — no install, no watermark.
Unblur image
Out-of-focus and compression blur respond strongly to reconstruction — the focused page for photos that are blurry rather than small.
Fix pixelated image
Blocks instead of softness? That is pixelation — the guide covers the causes, the manual fixes and where AI takes over.
Got a worn family print?
Start free — 2 credits on sign-up, no credit card required.
Restore your old photo